|
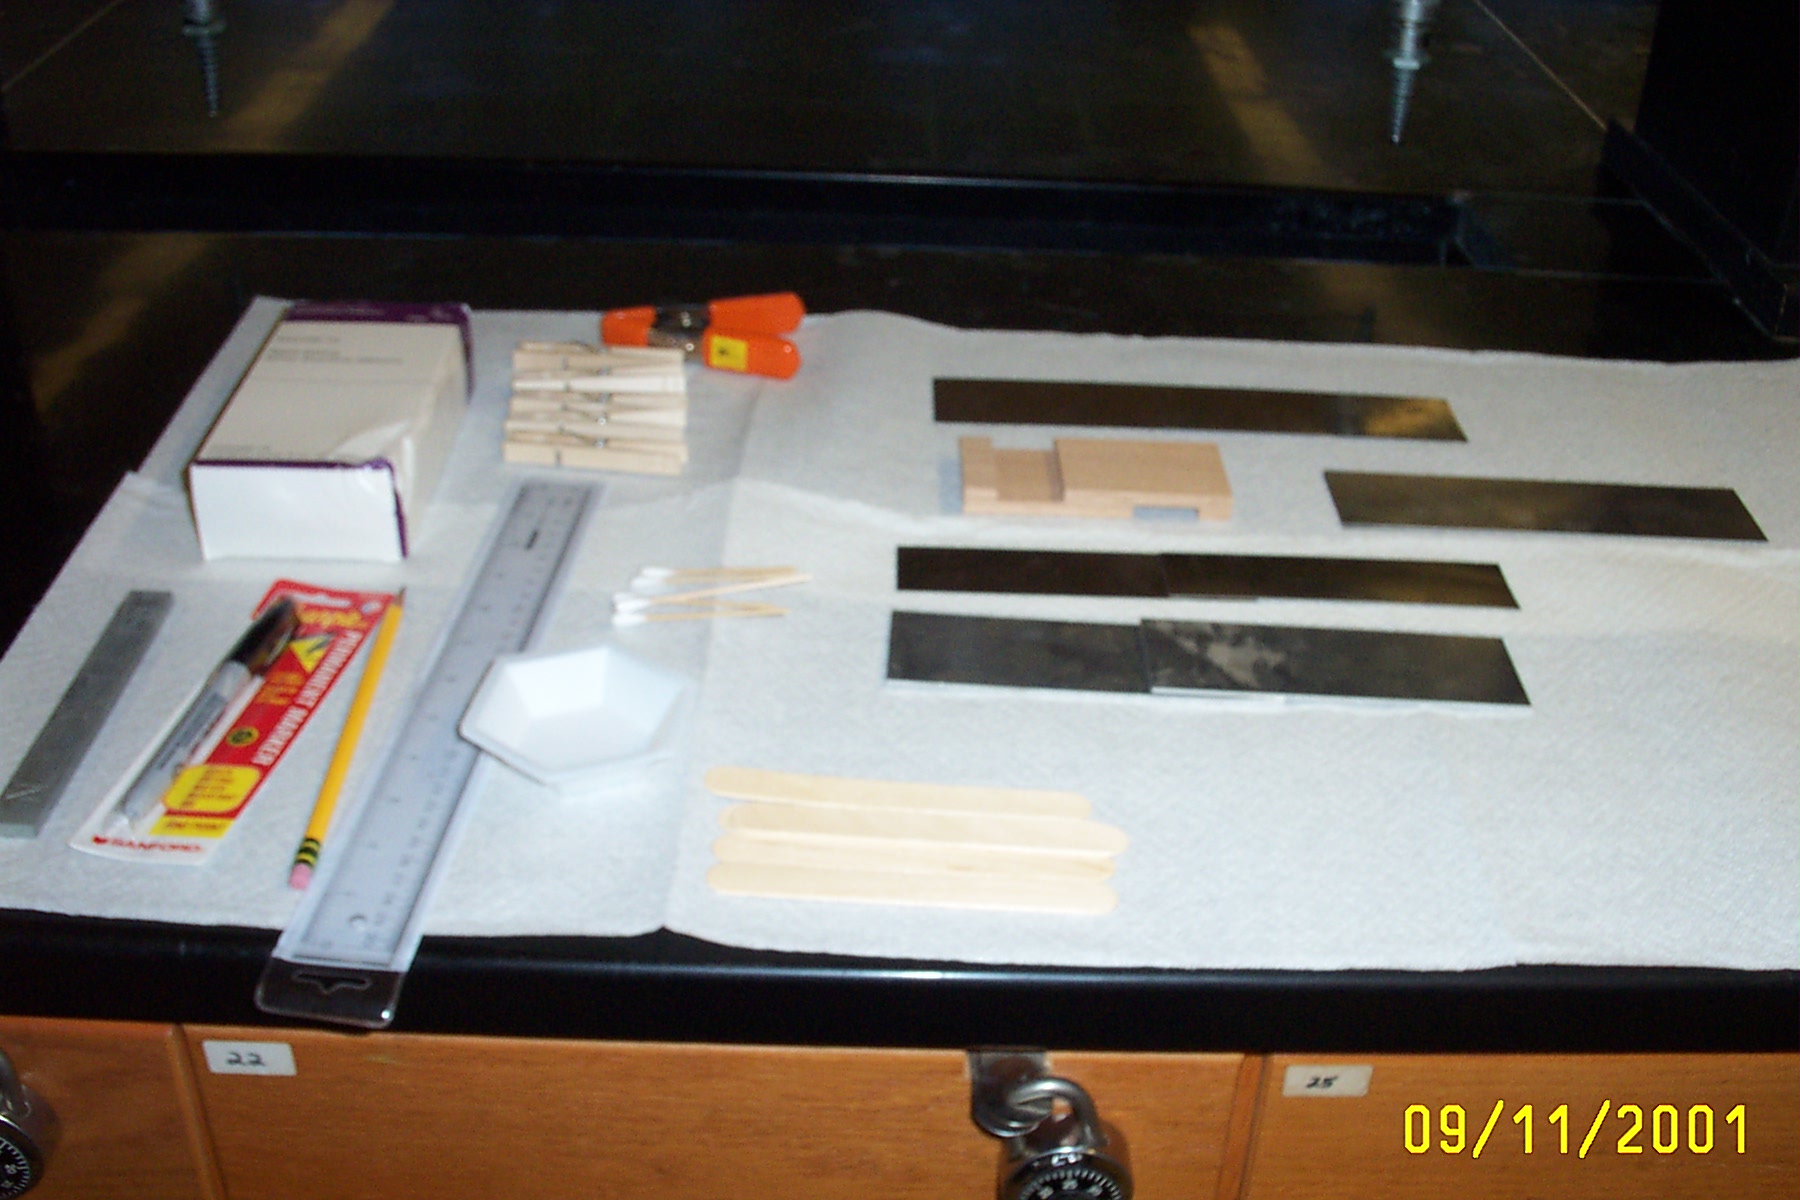
Shown
above is one of the five lab benches equipped to prepare the
control samples, to be assembled and cured in air. Included
are the epoxy, wooden spatulas, cotton swabs, marking pen,
marking pencil to delineate the area to be epoxied, ruler,
magnet to distinguish stainless steel from soft steel, disposable
mixing dishes, 1 orange clamp, 5 clothes pin clamps, oak wood
fixture for compression test, stainless steel and carbon steel
for tension test, thick aluminum for tension test, thin aluminum
for peel test. The samples are cleaned and degreased before
epoxy is applied.
Report
#2: Preparation of air-cure control samples
Written by MMA engineers: 1/C Foley
2/C Maguire
3/C McQueen
3/C Sunde
reports received by midnight 9/15/2001
__________________________________________________________________
Epoxy 3070
__________________________________________________________________
Today we used the epoxy # 3070 on five different samples. The samples
were OW (oak wood), SS (stainless steel), CS (carbon steel), AH (heavy
aluminum sheet), AL (light aluminum sheet).
The first thing that we did when we began this lab was to wash all of
the metal with hot soapy water to remove fingerprints and oily greases from,
and dry.
After that, we laid out the metals and wood to mark with a pencil where
we will overlap the SS, CS, AH so Prof. Ucci's students can perform a
tension test. The Al was over lapped one piece over another to perform
a peel test. The oak wood will be over lapped and compression test will
be performed. We labeled all of the materials with a waterproof pen
with the date, epoxy codes, cure conditions, and material.
Then we worked in the fume hood and mixed both the catalyst and resin
with equal parts on a paper plate and stirred with wooden (tongue)
depressors. After that, I went back to the workstation and spread an
even and smooth amount of epoxy onto the metal and wood surfaces.
On the metal surfaces we used one small clothes pin clamp to apply
pressure to the metal of the adhered surface.
We found that the pot life of the mixed epoxy was about ten minutes;
after that the epoxy began to get tacky and was hard to work with.
I recommend mixing the epoxy under a fume hood. I found that while
applying the epoxy the fumes did not bother me.
The resin and catalyst was a paste-like substance and a little
difficult to mix.
I dont feel that applying the epoxy will be a problem. The only
thing that I can see is that it will take a longer time for the epoxy
to set up.
_______________________________________________________
The Adhesive we used was the type 3070. Some observations are that
(we) had two cans, one was the resin and the other was the adhesive
catalyst. (We) had to mix the two together. Once they were mixed,
the pot-life was about 5-7 minutes long. Gloves should be used because
it is very hard to keep the adhesive off of you while trying to apply
the adhesive. Also, only apply a small amount because it is easily
spread over a large surface. Another suggestion is to use the fume
hood while mixing, but for applying epoxy, it (the fume hood) is
optional.
My technical thoughts about applying this adhesive in water is that
it will probably take longer, which means the pot-life will become
a factor.
________________________________________________________
Repairitquik Epoxy
________________________________________________________
Observations: The adhesive was easily mixed with bare
hands. The directions call for the application to
(knead) the "putty" (until it) becomes a uniform color.
Applying the "putty" is quite easy as it spreads with
little effort.
Thoughts: The entire mixing precedure would be
impossible given the sub's limited dexterity; however,
mixing could be done on the surface before the dive.
(editor's note: what is the pot life underwater?)
The applying would be very simple as the adhesive
would only have to be "smeared" on the rock surface;
this could be done with a tool or with the sub arm
itself. If the sub could bring down a large amount of
pre-mixed RiQ, at this point I beleive that most of the
obstacles would be overcome.
________________________________________________________
Bio-Fix 911
________________________________________________________
The adhesive I was working on is called Bio-fix 911. It requires
the mixing of equal parts of both the base and activater until a
uniform color appears. Its consistency is like that of soft ice
cream, which may mean it may be hard to apply in moving water. Its
color is very earthy and dull. This may make it hard to see in deep,
murkey water. The smell of the base is very overpowering and thus
it shouldn't be opened or exposed in an enclosed, unventilated space.
Also, while curing, it emits a large amount of heat for the amount
mixed. The hardest problem to address is the application. Once
mixed, the epoxy is extremely gooey, and needs to be applyed quickly
for maximum effect. As such, a gun would need to be constructed for
application. My personal thoughts, as of right now, is that this
substance is a poor candidate for the job prescribed.
_________________________________________________________
No reports were received for Fastweld epoxy or Epoxo88 epoxy.
_________________________________________________________
|
